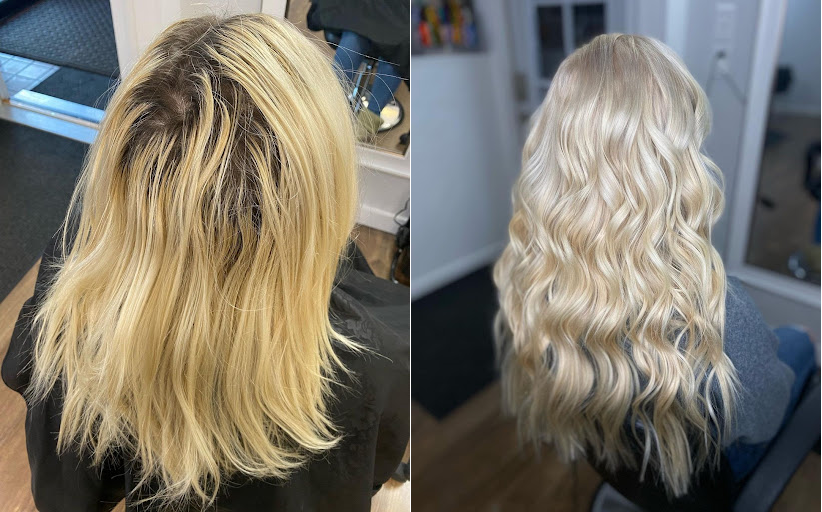
How to Go From Short to Long Hair With Extensions
Getting a haircut to go from long hair to short hair only to regret it later—we’ve all been there! So, is there a way to get your long hair back instantly without waiting for it to grow back? The answer is yes, with clip-in hair extensions.
Clip-in hair extensions allow you to rock long hair until your natural hair grows back. They allow you to add length to your short hair within minutes without a permanent commitment to extensions and with no damage to your natural hair.
Whether you want to mimic Ariana Grande’s power-ponytail or Lauren Conrad’s beautiful, luscious mane, clip hair extensions have your back. Don’t believe us? Head over to Google and search hair extensions for short hair before and after photos. The transformations are sure to amaze you!

Follow the tips and tricks given below to transform your appearance with clip-in extensions instantly:
1. Choose a Set of Thick Wefts
Because your hair is short, you’ll need more hair to go from shorter to longer hair. It’s always a good idea to choose thick hair extensions. We recommend the densest 220g wefts set for short hair. You can use two 220g sets of varying colors to create a seamless blend with your hair.
Consider mixing the strands from the different colored wefts over each other to achieve a flattering, fuller look. Doing so will also add depth and dimension to your hair. And before installing the wefts to your hair, be sure to brush the extensions with a loop brush gently.
2. Clip Away the Hair at the Nape of Your Neck
This trick works perfectly to mix the clip-in wefts with short hair while camouflaging the peeving, shorter giveaway strands at the bottom of your head. Start by segmenting your hair so that only a tiny portion is left at the nape of your neck. Next, turn the hair segment to the side or braid it. Then, use a pin to hold it flat against the bottom of your head. Now you’ve created a section where you’ll be putting in your first extension.
3. Don’t Hesitate to Go Higher
When applying clip-in hair extensions to short hair, you must provide maximum coverage to your hair. As such, you should feel free to start clipping in the wefts from the nape of your neck and then move upwards until you reach the crown area. You’ll notice that the last weft will sit very high on your head. That’s okay because it will help cover your short hair adequately under the extensions.
4. Use the Widest Extension to Hide the Short layers
Strategic placement can help to conceal any short layers in your hair. Make sure to put in two 3-clip pieces alongside each other on the sides of your head, with the wefts going over each other a bit in the rear region. Now, install the widest extension to cover the entire back of your head, concealing all the short layers. Doing so will give your hair a natural, cohesive look.
5. Apply Your Face Framing Wefts
To create a beautiful face frame, it is a good idea to cut both of your 3-clip pieces. It will ensure that the segments at the forefront of your face are shorter and mix seamlessly into the short layers. ZALA clip-in hair extensions are made of 100 percent Remy human hair, allowing you to cut, treat, and style them just like your own hair.
Moreover, you could give your hair a good finish by installing single clip extensions in areas that require more length, thickness, or volume. For example, you could put in a weft or two behind your ears as a final touch.
6. Create Curls and Waves in Advance
If you want to add curls or waves to your hair, be sure to do it before applying the extensions. It will save you time and effort. Once done, you can snap the wefts to your hair and just brush up some curls to mix the wefts with your hair. For instance, it is good to curl the short hair with the long hair after the wefts are in. Feel free to use a heat tool at the lowest temperature to curl any short edges towards the inside.
Did the very short hair to long hair extensions before and after transformation amaze you? Share your thoughts with our community!


